Have you always wanted to try the 2 finger scroll on a PC after trying it out on the Mac? If you have a laptop with a touchpad by Synaptics, you can try a little program that enables two finger scrolling on the PC.
Go to: http://code.google.com/p/two-finger-scroll/downloads/list
Sunday, January 25, 2009
Saturday, January 24, 2009
MSI Wind U100 Netbook Touchpad Driver Solution
We recently got the MSI Wind U100 US/French/German/Polish edition and found out the touchpad is missing the side scrolling function and has the default control of clicking and double clicking on the touchpad which could not be disabled. The Wind uses the default Windows XP mouse driver with no special touchpad driver. Apparently, this is something that MSI had downgraded for whatever cost saving reason (I assume someone at MSI did not pay enough for lap dances to some name brand touchpad company official) but it is highly annoying because you end up accidentally clicking on links, especially personal ads on Yahoo, because you have shaky fingers from alcohol withdrawal or early onset Parkinson's. There are a lot of forums incessantly discussing and howling at this atrocity but I just went to Synaptics and downloaded their driver and application and avoided the drama.
Solutions:
Go to Synaptics and download the appropriate driver:
http://www.synaptics.com/support/drivers
This bundled driver and application that you install is accessed through an icon in the lower right corner of the XP menu bar or the XP mouse control panel and allows you to control every aspect of the touchpad from disabling touchpad clicking, turning on touchpad side scrolling, etc.
There are forums out there that point you to a German MSI website that allows you to download the Sentelic touchpad driver which I tried and did absolutely nothing for me. I tried installing the Sentelic touchpad driver before the Synaptics driver. If you want to waste 10 minutes of your life, here it is:
http://www.msi-technology.de/index.php?func=downloaddetail&type=driver&maincat_no=135&prod_no=1474
Monday, December 29, 2008
Virus/Trojan with Pop-Ads and Disabled Windows XP Automatic Updates with Error 1058
A nasty virus/Trojan with pop up windows affecting both IE 6 and Firefox 3 started on one of my laptops. It initially started with Acrobat starting up a couple a times in previous days before the full onslaught of pop up windows trying to sell crap. Yeah, like I'm going to click on a Caribbean vacation and spend boat loads of money from a virus produced pop up ad, dumb.
It added Add On components into IE and Firefox, and probably into the system. The virus also turned off Automatic Updates for Windows XP and attempts at turning it on through the Control Panel failed. Running Windows Update gives an error, and the error page on the Windows Update web site gives you a list of items to turn on in services.msc through the Run... window. Trying to turn on Automatic Updates in services.msc to "Automatic" and "Start" gives an error 1058. This loser virus then starts asking if you want to install VirusRemover, A-holes. I tried the following measures:
1. Ran AVG 8 Scan, restarted: Fail. Pop ups continue.
2. Ran Ad-Aware 2008 Scan, restarted: Fail. Pop ups continue.
3. Ran Malwarebytes' Anti-Malware Scan (via download.com), restarted: Success! No more pop ups. Approximately 15-20 infected files.
After successfully running Malwarebytes, I went into services.msc (throught the Run... window in the Start button) and opened the properties of Automatic Updates. I was able to change the Automatic Updates to "Automatic" and "Start" the service.
Source: http://help.wugnet.com/windows2/automatic-updates-disabled-error-1058-ftopict519669.html
Monday, December 15, 2008
Microsoft Word 2003 Crashes at Startup
Microsoft Office 2003 Word was crashing several seconds after startup which also happened when a new Outlook email was created (Outlook opens Word for text editing). Crashes can be avoided if the mouse is moved around the menus, but after 2 seconds of idle time, Word crashes.
Solutions:
1. Go to Printer and Faxes, and select the correct default printer. Now try opening Word.
2. With Hidden Folder viewing on, Go to C:>Documents and Setting>User>Application Data>Microsoft>Templates. Change normal.dot to normal.old. Open Word and let Word create a new normal.dot file.
Source: http://www.officearticles.com/word/steps_to_troubleshooting_microsoft_word.htm
Sunday, November 23, 2008
Filemaker Pro Database Instant Web Sharing (IWS)
How to set Filemaker Pro 9 to share your database as a website on the internet.
~
Open your database in Filemaker Pro 9 from the computer you wish to Host the database. I know at least FMP 6 - 9 can publish databases on the web. I will refer only to FMP 9.
Goto: File>Sharing>Instant Web Publishing...
Turn on Instant Web Publishing to publish all open and available databases on the web.
Change the port to 591. Click OK.
For now leave the Instant Web Publishing access to file, to All Users, you can change this at your own discretion.
Your Currtently open files should be listed. Click OK.
Goto: File>Manage>Accounts & Privileges...
Make sure Admin is turned on, select Admin, Click on Edit...
Set a Password. Click OK.
If you have a Router, you must:
Open the start/end/internal/external TCP port (AKA, gateway, pinhole, service) 591 and specify which computer IP is hosting the FMP database file in your LOCAL network (LAN). For example, 192.168.1.4, is the host computer IP with the FMP database open and running in the local office network. Find this number by logging into your router and identifying the database host computer and its LOCAL IP address. That is, inquiries from the outside world to your host computer that have FMP data, will be forwarded by your router to your specified local network host computer 192.168.1.4 through port 591.
Find out the IP address of your WAN (wide area network), that is, get the IP address that your broadband carrier assigns you (for example, 60.123.4.123), or know your domain name (for example, domain.name.com)
Close and restart FMP 9.
Your database web server setup is now complete.
From a remote location inside the office or outside of the local network, open a web browser and do the following:
In the address bar, type in the static IP address or domain name with the addition of :591 at the end, for example, http://60.123.4.123:591 or http://domain.name.com:591.
If you have a dynamic IP that changes when the router is restarted or if there is a power failure, you can obtain a static pseudo domain name from sites such as www.no-ip.com.
The Filemaker web page should appear with your file available as a link.
Click on the link and log in as admin with the password.
Certain dynamic functions from FMP are not available on a static web page. One thing that is missing is Preview mode. Functions requiring the preview mode such as displaying label sheets for printing are not possible through Instant Web Sharing and require Network Sharing with a remote FMP 9 client connection to the server.
~
~
Open your database in Filemaker Pro 9 from the computer you wish to Host the database. I know at least FMP 6 - 9 can publish databases on the web. I will refer only to FMP 9.
Goto: File>Sharing>Instant Web Publishing...
Turn on Instant Web Publishing to publish all open and available databases on the web.
Change the port to 591. Click OK.
For now leave the Instant Web Publishing access to file, to All Users, you can change this at your own discretion.
Your Currtently open files should be listed. Click OK.
Goto: File>Manage>Accounts & Privileges...
Make sure Admin is turned on, select Admin, Click on Edit...
Set a Password. Click OK.
If you have a Router, you must:
Open the start/end/internal/external TCP port (AKA, gateway, pinhole, service) 591 and specify which computer IP is hosting the FMP database file in your LOCAL network (LAN). For example, 192.168.1.4, is the host computer IP with the FMP database open and running in the local office network. Find this number by logging into your router and identifying the database host computer and its LOCAL IP address. That is, inquiries from the outside world to your host computer that have FMP data, will be forwarded by your router to your specified local network host computer 192.168.1.4 through port 591.
Find out the IP address of your WAN (wide area network), that is, get the IP address that your broadband carrier assigns you (for example, 60.123.4.123), or know your domain name (for example, domain.name.com)
Close and restart FMP 9.
Your database web server setup is now complete.
From a remote location inside the office or outside of the local network, open a web browser and do the following:
In the address bar, type in the static IP address or domain name with the addition of :591 at the end, for example, http://60.123.4.123:591 or http://domain.name.com:591.
If you have a dynamic IP that changes when the router is restarted or if there is a power failure, you can obtain a static pseudo domain name from sites such as www.no-ip.com.
The Filemaker web page should appear with your file available as a link.
Click on the link and log in as admin with the password.
Certain dynamic functions from FMP are not available on a static web page. One thing that is missing is Preview mode. Functions requiring the preview mode such as displaying label sheets for printing are not possible through Instant Web Sharing and require Network Sharing with a remote FMP 9 client connection to the server.
~
Wednesday, November 19, 2008
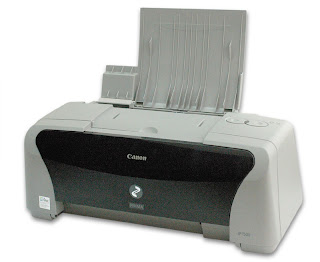
Canon Pixma 1500 Error Reset of: Waste Ink Absorber is Almost Full or Full
There is no need for a Software download of General Tools for the Pixma 1500 in these methods. The software links for General Tools seem to be dead.
 1st Method
1. Turn off the printer. And disconnect the printer cable.
2. Press and hold the POWER button, turn on the printer.
3. The indicator LED should be green.
4. Press and release the RESUME button , the indicator LED should be orange.
5. Press and release the RESUME button again, the indicator LED should be green.
2nd Method
1. Unplug the power & printer cables.
2. Press & hold the POWER button.
3. Plug POWER cable back in while still pressing power button.
4. The LED should be green.
5. Press & release the RESUME button 4 times to reset the "waste ink tank counter" while still holding the power button.
6. Release both the POWER & RESUME on the 4th push of RESUME.
Troubleshooting:
If indeed the waste absorbers are full, you will need to take them out, wash them, and place them back into the Pixma 1500.
1. Open the the front door, hopefully the tanks slide to the left out from under the plastic enclosure on the right. If not, reset the Pixma by unplugging, holding the power button down, and then plugging in the Pixma with the power button held down. Release and push the power button to turn on the Pixma, this time when opening the front door, the tanks should slide to the left out of the plastic enclosure on the right.
2. The absorbers are on the floor of the inside of the Pixma, on the right, below the plastic enclosure where the tanks usually rest when it is in idle. It consists of 2 plasticky pieces, each slightly smaller than a Trident gum piece, with one slightly bigger than the other. They are held in place by a rubber gasket. When you see them, they will be black, covered with wet ink. Pry them out by the edges from the rubber gasket, your fingers will be stained with ink.
3. Wash the 2 absorbers, you will discover that the original color of the absorbers is white. Dry them.
4. Take tissue and dab the area where the rubber gasket is, to absorb the remaining ink.
5. Replace the 2 white absorbers back into the rubber gaskets, minding to place the correct size absorber in the correct portion of the gasket.
6. Close the cover, and the green power light should be solid and ready to go.
Wednesday, November 12, 2008
Create a Button in Filemaker 9 that Saves a PDF and Emails it to an Email on the Record
In Layout Mode:
Goto: Scripts>ScriptMaker...>Perform Script
Click: New
Name the Script Name: Create PDF and Email
Double Click: Save Records as PDF
Check off: Perform without dialog
Check off: Specify output file
Click: Add File..., Navigate to a folder that you will save a temporary PDF, Type a new File Name that is reasonable, such as in my case "Sales Contract", Save
Copy the Output File string to the Clipboard
Do Not Check the Boxes, Automatically open File nor Create email with file as attachment
Click: OK
Check off: Specify Options
Choose to Save: Current Record
Click: OK
Double Click: Send Mail, in the Actions List on the Left under Miscellaneous
Click: Specify...
Click the arrow head at the right end of the To: box and Specify Field Name of the Email Records
Click: OK
Click: Attach File and Specify..., Paste the string from the Clipboard (of the Folder you will store the temporary PDF file)
Click: OK
Click: OK
Close the Script and Save
Close ScriptMaker
Insert>Button...>Perform Script>Specify...>Create PDF and Email
Click: OK
Change the Current Script to: Resume
Click: OK
Change to Browse Mode and Click on the new button
A new Email composition window will pop up with the current record's email address
The PDF attachment should be attached.
Unfortunately, signature information in Outlook do not get added at the end of the email
Subscribe to:
Posts (Atom)